HV Battery (RWD) (1-Phase) (Remove and Install)
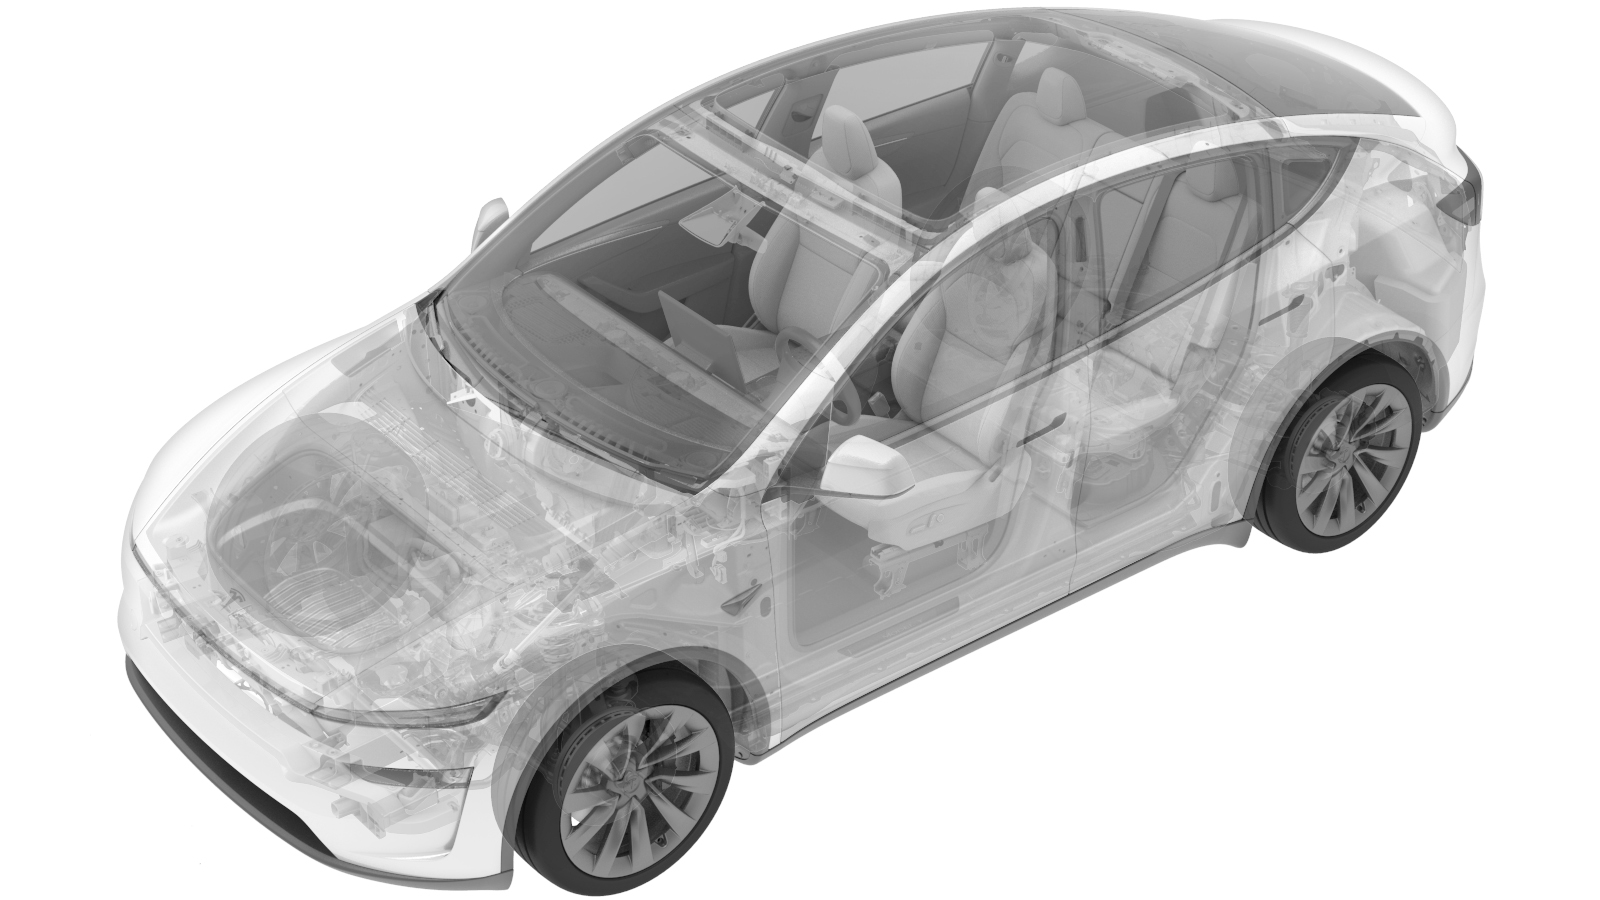 Correction code
1601010601
3.24
NOTE: Unless
otherwise explicitly stated in the procedure, the correction code and its
associated FRT reflect all of the work required to perform this procedure,
including the linked procedures. Do not stack correction
codes unless explicitly told to do so.
NOTE: See Flat Rate Times to
learn more about FRTs and how they are created.
NOTE: See Personal Protection to make
sure you are wearing proper PPE when performing the procedure below.
NOTE: See Ergonomic Precautions for safe and healthy
working practices.
- 2026-10-20: Removed the removal and installation steps for stabilizer bar, the 2nd row 40 seat and the HV battery front manifold tube, and updated the HV disablement procedure.
- 2025-06-04: Added instruction to zero adjust the Hioki resistance meter prior to measurement.
Remove
- Open all four doors and lower all four windows.
- Open the liftgate.
- Enter Service Mode. See Service Mode.
- Remove the LH and RH rocker carriers. See Rocker Carrier - LH (Remove and Replace).
-
Remove butyl patches covering LH rocker access holes
Note2x butyl patches, Clean excess butyl from area, Discard after removal
-
Install lift pad adapters onto LH lift
Note2x lift pad adapters
-
Remove butyl patches covering RH rocker access holes
Note2x butyl patches, Clean excess butyl from area, Discard after removal
-
Install lift pad adapters onto RH lift
Note2x lift pad adapters
- Raise and support the vehicle.
- Unlock the vehicle gateway. See Gateway (Unlock).
- On the touchscreen, tap the Service Mode "wrench" (at the bottom of the touchscreen UI), and then tap , and allow the routine to complete.
-
Move RH front seat forward
NoteAdjust seat back if needed to avoid contacting headliner
-
Move LH front seat forward
NoteAdjust seat back if needed to avoid contacting headliner
- Remove the 2nd row LH and center seat assembly. See Seat Assembly - 2nd Row - LH (5-Seat) (Remove and Install).
-
Disconnect the 2nd row 40 seat connector.
-
Separate carpet perforation below LH front seat to access LH middle inner HV battery
bolt
NoteLocated below rear of LH front seat, Expand the hole if necessary
-
Remove LH middle inner HV battery bolt
Note1x bolt, 16mm, 66 Nm
-
Separate carpet perforation below RH front seat to access RH middle inner HV battery
bolt
NoteLocated below rear of RH front seat, Expand the hole if necessary
-
Remove RH middle inner HV battery bolt
Note1x bolt, 16mm, 66 Nm
-
Position air bag beneath rear cabin carpet to raise and allow access to rear inner HV
battery bolts
-
Remove LH rear inner HV battery bolt
Note1x bolt, 16mm, 66 Nm, Located below LH rear main carpet
-
Remove RH rear inner HV battery bolt
Note1x bolt, 16mm, 66 Nm, Located below RH rear main carpet
- Remove the LH lower A-pillar trim. See Trim - A-Pillar - Lower - LH (Remove and Replace).
- Remove the LH side center console panel. See Side Panel - Front - Center Console - LH (Remove and Replace).
-
Release OBD port from LH cabin carpet cover
Note2x tabs, Press black tabs to unlock then push upwards out of footwell cover
-
Disconnect E-CALL speaker connector
Note1x connector
-
Fold LH front cabin carpet rearward
NoteDifferent regions may stick the carpet and foam together and tear them apart
-
Remove foam plug to access LH front inner HV battery bolts
Note1x foam plug
-
Remove both LH front inner HV battery bolts
Note2x bolts, EP20, 136 Nm
- Remove the RH lower A-pillar trim. See Trim - A-Pillar - Lower - LH (Remove and Replace).
- Remove the RH side center console panel. See Side Panel - Front - Center Console - RH (Remove and Replace).
-
Fold RH front cabin carpet rearward
NoteManeuver carpet below brake pedal and accelerator pedal, Different regions may stick the carpet and foam together and tear them apart
-
Remove foam plug to access RH front inner HV battery bolts
Note1x foam plug
-
Remove both RH front inner HV battery bolts
Note2x bolts, EP20, 136 Nm
- Disconnect the LV power. See LV Power (Disconnect and Connect) (Modify).
- Perform the Vehicle HV Disablement Procedure. See Vehicle HV Disablement Procedure.
-
Release LH body harness from rear body and move aside
Note1x clip
-
Partially remove LH B-pillar lower trim
Note1x push clip
-
Partially pull out LH rear body harness
-
Remove all items from pockets and ensure not wearing metal items
-
Inspect HV insulating gloves
NoteCheck gloves for damage prior to use, Refer to service document TN-15-92-003, For information on inspecting HV gloves. https://service.teslamotors.com/documents?model=&keys=TN-15-92-003&vehicle_system=&sort_by=field_date_submitted&sort_order=DESC
-
Put on HV insulating gloves and leather over gloves
-
Remove fastener securing busbar cover access door
Note1x bolt, 10mm, 9 Nm
-
Remove bolts securing charge port busbar kit to HV header
Note2x bolts, 10mm, 9 Nm
-
Lift busbar kit connector to remove from HV header
NoteUse inflatable air bag to suspend Busbar away from HV header during removal and installation, Hold busbar firmly as there is tension on, Avoid damaging the harness bracket
-
Remove HV insulating gloves
-
Disconnect HVC logic connector and install logic cap
Note1x connector, 1x cap, Release locking tab then push the handle downward to release connector
-
Release positive 12V output cover from PCS cable
Note1x cover
-
Remove PCS cable from 12V passthrough output
Note1x nut, 13mm, 9 Nm, Discard nut after removal
-
Remove nut securing DCDC ground busbar to HV battery
Note1x nyloc nut, 13mm, 9 Nm, Discard nut after removal
-
Gently lift the DCDC ground busbar upwards
-
Close LH front door latch
-
Close LH rear door latch manually
-
Close RH front door latch
-
Close RH rear door latch manually
-
Close all four doors
-
Raise and support vehicle
NoteRecommended assistance, Before lifting, Ensure that the vehicle is not connected to a charging device, The positioning pin must be inserted into the car body holes
- Remove the front aero shield panel. See Aero Shield - Front (Remove and Replace).
-
Release LH front wheel liner from skid plate
Note1x bolt, 10mm, 5 Nm
-
Remove clip securing LH wheel liner to body
Note1x push clip
-
Release RH front wheel liner from skid plate
Note1x bolt, 10mm, 5 Nm
-
Remove clip securing RH wheel liner to body
Note1x push clip
-
Use bungee strap to pull back LH front wheel liner
NoteSecure to subframe
-
Use bungee strap to pull back RH front wheel liner
NoteSecure to subframe
-
Remove front skid plate
Note4x bolts, EP10, 13 Nm, 2x tabs, Move forward to remove
-
Inspect HV insulating gloves
NoteCheck gloves for damage prior to use, Refer to service document TN-15-92-003, For information on inspecting HV gloves. https://service.teslamotors.com/documents?model=&keys=TN-15-92-003&vehicle_system=&sort_by=field_date_submitted&sort_order=DESC
-
Put on HV insulating gloves and leather over gloves
-
Disconnect AC compressor HV harness connector from HV Ancillary harness
Note1x locking connector, 3 stage locking connectors, Disengage the red locking tab by pulling it away from the connector, Depress yellow tab and pull the connector backward then depress the green tab to release
-
Remove HV insulating gloves
-
Position coolant drain container underneath LH front of HV battery
-
Disconnect HV battery return hose at LH side of vehicle and plug hoses
Note1x spring clip, If the battery is returned to Reman, Please remove the special tool plugs
-
Release Chiller to Battery hose from Dash Crossmember
Note1x clip
-
Disconnect HV battery manifold hoses and plug hoses
Note1x spring clip, Loss of coolant greater than 1L requires coolant vacuum fill, If the battery is returned to Reman, Please remove the special tool plugs
-
Position coolant drain container underneath RH front of HV battery
-
Disconnect powertrain return hose from powertrain return tube and plug hoses
Note1x spring clip
-
Disconnect powertrain supply hose from powertrain supply tube and plug hoses
Note1x spring clip, Coolant loss greater than 1 L will require vacuum fill, If the battery is returned to Reman, Please remove the special tool plugs
-
Position coolant drain container underneath front of HV battery
-
Disconnect LH coolant hose from rear of HV battery
Note1x spring clip, 2x plugs, Plug both the coolant hose and passthrough, If the battery is returned to Reman, please remove the special tool plug
-
Disconnect RDU inverter inlet hose from rear of HV battery and plug both ends
Note1x spring clip, 2x plugs, Coolant loss greater than 1 L will require vacuum fill, If the battery is returned to Reman, Please remove the special tool plug
-
Position coolant drain underneath RH rear of HV battery
-
Disconnect coolant outlet hose to rear return hose and plug hoses
Note1x spring clip, 2x plugs, Use shop towel to clean any residue coolant inside RH rocker panel if necessary, Coolant loss greater than 1 L will require vacuum fill, If the battery is returned to Reman, Please remove the special tool plugs
-
Remove coolant drain container from underneath vehicle
-
Release clip securing coolant hoses to RH shear plate
Note1x fir tree clip
-
Position support stand to support front portion of rear subframe
-
Remove smaller fasteners for LH shear plate
Note2x bolts, 13mm, 64 Nm
-
Remove large bolt securing LH shear plate and subframe to body and remove shear
plate
Note1x bolt, 21mm, 125 Nm
-
Hand tighten bolt securing LH side of subframe to body
Note1x bolt, 21mm, 125 Nm
-
Remove smaller fasteners for RH shear plate
Note2x bolts, 13mm, 64 Nm
-
Remove large bolt securing RH shear plate and subframe to body and remove shear
plate
Note1x bolt, 21mm, 125 Nm
-
Hand tighten bolt securing RH side of subframe to body
Note1x bolt, 21mm, 125 Nm
-
Remove support stand from under vehicle
-
Place HV battery table into position and lower vehicle to support HV battery
NoteRecommend assistance, Line up table so center 4 bolts are accessible through opening in table, Adjust final battery table position using adjustable caster jacks on table
-
Remove central bolts securing HV battery center ski cover
Note4x bolts, EP14, 34 Nm
-
Remove bolts securing LH front support bracket to vehicle
Note4x bolts, 16mm, 110 Nm
-
Remove bolts securing RH front support bracket to vehicle
Note4x bolts, 16mm, 110 Nm
-
Remove LH bolts securing HV battery to vehicle
Note8x bolts, 13mm, 35 Nm
-
Remove RH bolts securing HV battery to vehicle
Note8x bolts, 13mm, 35 Nm
-
Raise vehicle free of HV battery
NoteRecommend assistance
-
Remove battery from under vehicle
NoteRecommend assistance
-
Remove penthouse engagement seal from HV battery pack
NoteDiscard anytime HV battery is removed from vehicle
Install
-
Install penthouse engagement seal onto HV battery pack
NoteThis seal is a one time use item and should be replaced each time a HV battery pack is removed from vehicle or installed onto a new HV battery pack if not equipped
-
Install HV battery alignment rods
Note2x rods, To body at front of vehicle, 2x rods, To battery near penthouse
-
Position HV battery under vehicle
NoteRecommend assistance
-
Lower vehicle onto HV battery and align holes
NoteRecommend assistance, Use alignment rods, Be sure coolant hoses do not get caught on alignment rods, Caution not to damage HV cable, Do not fully lower vehicle onto battery (this will help with installing battery bolts)
-
Loosely install RH bolts securing HV battery to vehicle hand tight
Note8x bolts, 13mm, 35 Nm, Ensure smooth thread engagement and bolts are not cross threaded into casting, Flush down bolts, Do not over tighten bolts, Fully torque at later step
-
Loosely install LH bolts securing HV battery to vehicle hand tight
Note8x bolts, 13mm, 35 Nm, Ensure smooth thread engagement and bolts are not cross threaded into casting, Flush down bolts, Do not over tighten bolts, Fully torque at later step
-
Remove HV battery alignment rods
Note2x rods, To body at front of vehicle, 2x rods, To battery near penthouse
-
Install LH rear inner HV battery bolt hand tight
Note1x bolt, 16mm, 66 Nm, Torque at later step
-
Install LH middle inner HV battery bolt hand tight
Note1x bolt, 16mm, 66 Nm, Torque at later step
-
Install RH rear inner battery bolt hand tight
Note1x bolt, 16mm, 66 Nm, Torque at later step
-
Install RH inner HV battery bolt hand tight
Note1x bolt, 16mm, 66 Nm, Torque at later step
-
Install both LH front inner HV battery bolts hand tight
Note2x bolts, EP20, 136 Nm, Torque at later step
-
Install both RH front inner HV battery bolts hand tight
Note2x bolts, EP20, 136 Nm, Torque at later step
-
Set bolts securing RH front support bracket to vehicle with cordless impact
Note4x bolts, 16mm, 110 Nm, Torque at later step
-
Set bolts securing LH front support bracket to vehicle with cordless impact
Note4x bolts, 16mm, 110 Nm, Torque at later step
-
Set central bolts securing HV battery center ski cover with cordless impact
Note4x bolts, EP14, 34 Nm, Ensure smooth thread engagement and bolts are not cross threaded into casting, Flush down bolts, Do not over tighten bolts, Fully torque at later step
-
Lower vehicle onto pack completely
NoteRecommend assistance
-
Torque RH bolts securing HV battery to vehicle
Note8x bolts, 13mm, 35 Nm
-
Torque LH bolts securing HV battery to vehicle
Note8x bolts, 13mm, 35 Nm
-
Torque bolts securing RH front support bracket to vehicle
Note4x bolts, 16mm, 110 Nm
-
Torque bolts securing LH front support bracket to vehicle
Note4x bolts, 16mm, 110 Nm
-
Torque central bolts securing HV battery through center ski cover
Note4x bolts, EP14, 34 Nm
-
Raise vehicle and lower onto locks, then remove battery table from under
vehicle
NoteRecommend assistance, Set vehicle to comfortable working height, Make sure there's an audible click of the locks on both sides before lowering, otherwise vehicle may tilt to the side
-
Position support stand to support front section of rear subframe
-
Remove bolt securing LH side of rear subframe to body
Note1x bolt, 21mm, 125 Nm
-
Install bolts securing LH shear plate to HV battery hand tight
Note2x bolts, 13mm, 64 Nm, Torque at later step
-
Install bolt and shear plate to LH side of rear subframe hand tight
Note1x bolt, 21mm, 125 Nm, Torque at later step
-
Torque bolt securing subframe and LH shear plate to body
Note1x front bolt, 21mm, 125 Nm, Mark bolt after torque
-
Torque bolts securing LH shear plates to vehicle
Note2x bolts, 13mm, 64 Nm
-
Remove bolt securing RH side of rear subframe to body
Note1x bolt, 21mm, 125 Nm
-
Install bolts securing RH shear plate to HV battery hand tight
Note2x bolts, 13mm, 65 Nm, Torque at later step
-
Install bolt and shear plate to RH side of rear subframe hand tight
Note1x bolt, 21mm, 125 Nm, Torque at later step
-
Torque bolt securing subframe and RH rear shear plate to body
Note1x bolt, 21mm, 125 Nm
-
Torque bolts securing RH shear plates to vehicle
Note2x bolts, 13mm, 64 Nm
-
Remove support stand from under vehicle
-
Install clips securing coolant hoses to LH shear plate
Note2x fir tree clips
-
Install clip securing coolant hoses to RH shear plate
Note1x fir tree clip
-
Position coolant drain underneath RH rear of HV battery
-
Remove hose plugs and connect coolant outlet hose to rear return hose
NotePerform a push-pull-push test to make sure the hose is fully seated. Do not wiggle the hose at the connection.
-
Position coolant drain container under LH rear of vehicle
-
Remove plugs and connect RDU inverter inlet hose to rear of HV battery
NotePerform a push-pull-push test to make sure the hose is fully seated. Do not wiggle the hose at the connection.
-
Connect LH coolant hose to rear of HV battery
NotePerform a push-pull-push test to make sure the hose is fully seated. Do not wiggle the hose at the connection.
-
Remove coolant drain container from underneath vehicle
-
Put on HV insulating gloves and leather over gloves
-
Connect RDU HV cable to HV battery
Note1x connector, Make sure the connector lock is 90 degrees from the connector before beginning to secure the connector, Use one hand to support the connector while other latching locking tab. Once installed, Verify that the latch is not damaged and fully secured in the latched position
-
Install nut securing RDU HV cable bracket to HV battery
Note1x nut, 10mm, 10 Nm
-
Remove HV insulating gloves
-
Position HV battery rear skid plate enclosure
NoteRecommend assistance if needed
-
Install upper bolts securing HV battery rear skid plate enclosure hand tight
Note4x bolts, 13mm, 64 Nm
-
Install lower bolts securing HV battery rear skid plate enclosure
Note2x bolts, EP10, 13 Nm
-
Torque bolts securing HV battery rear skid plate enclosure to vehicle
Note4x bolts, 13mm, 64 Nm
-
Install RH side hose clips to rear battery skid plate
Note2x fir tree clips
-
Install LH side hose clip to rear battery skid plate
Note1x fir tree clip
- Install the rear aero shield. See Aero Shield - Rear (Remove and Replace).
-
Position coolant drain container underneath front of HV battery
-
Connect HV battery front manifold coolant hose
Note1x spring clip, Remove plugs, Perform push-pull test to verify hoses are fully engaged. Loss of coolant greater than 1L requires coolant vacuum fill
-
Install Chiller to Battery hose to Dash Crossmember
Note1x clip
-
Position coolant drain container underneath LH front of HV battery
-
Connect HV battery coolant return hose
Note1x spring clip, Remove plugs, Perform push-pull test to verify hoses are fully engaged. Loss of coolant greater than 1L requires coolant vacuum fill
-
Position coolant drain container underneath RH front of HV battery
-
Connect bypass powertrain return hose
Note1x spring clip, Remove plugs, Perform push-pull test to verify hoses are fully engaged. Loss of coolant greater than 1L requires coolant vacuum fill
-
Connect powertrain supply hose
Note1x spring clip, Remove plugs, Perform push-pull-push test to make sure hose is fully engaged. Loss of coolant greater than 1L requires coolant vacuum fill
-
Remove coolant drain container from underneath vehicle
-
Put on HV insulating gloves and leather over gloves
-
Connect AC compressor HV harness connector to HV Ancillary harness
Note1x locking connector, 3 stage locking connector, After the connector is seated and there is an audible click, Engage the second lock by pressing towards the connector, Engage locking tab
-
Remove HV insulating gloves
-
Install front skid plate
Note4x bolts, EP10, 13 Nm, 2x tabs, Position and move backward to installation
-
Release LH front wheel liner from bungee strap
NoteRemove strap from vehicle
-
Install LH front wheel liner from skid plate
Note1x bolt, 10mm, 5 Nm
-
Install clip securing LH wheel liner to body
Note1x push clip
-
Release RH front wheel liner from bungee strap
NoteRemove strap from vehicle
- Install the front aero shield panel. See Aero Shield - Front (Remove and Replace).
-
Move rack arms away from vehicle
-
Install butyl patches onto LH rocker access holes
Note2x butyl patches, Apply pressure along patch to verify fully secured to body, Replace with new patch, Cut to the required size, Roughly 2" x 2 1/2"
-
Install butyl patches onto RH rocker access holes
Note2x butyl patches, Apply pressure along patch to verify fully secured to body, Replace with new patch, Cut to the required size, Roughly 2" x 2 1/2"
- Install the LH and RH rocker carrier and rocker cover to the vehicle. See Rocker Carrier - LH (Remove and Replace).
-
Install DCDC ground busbar to HV battery
NoteGently press down
-
Install nut securing DCDC ground busbar to HV battery
Note1x nyloc nut, 13mm, 9 Nm, Install new nyloc nut
-
Install positive 12V output from PCS cable and torque nut securing it
Note1x nut, 13mm, 9 Nm, Install new nut, Mark the nut after torque
-
Install positive 12V output cover to PCS cable
Note1x cover
-
Remove logic cap and connect HVC logic connector
Note1x connector, 1x logic cap, Align connector then pull the handle to locking position get connector fully seated
-
Put on HV insulating gloves and leather over gloves
-
Clean HV connector contact surface of residual Penetrox
NoteAllow 1 minute dry time, New busbar comes with penetrox applied to HV connector
-
Clean busbar HV connector contact surface of residual Penetrox
NoteAllow 1 minute dry time after removing Penetrox, It is necessary to clean HV connector during re-use of busbar
-
Apply Penetrox onto HV connector joints
NoteApply 2 drops of Penetrox A-13 about 5mm in diameter to either side of the hole on both leads, Spread evenly to verify the contact surface is fully covered
-
Remove Inflatable Air Bag from under HV header
-
Position busbar kit connector and lower onto HV header
Note4x guide tabs, Shift rear end of busbar assembly upward to help ease installation, If excessive force is required to seat busbars, They may have been bent. Inspect for damage and replace if necessary
-
Install bolts securing charge port busbar kit to HV header
Note2x bolts, 10mm, 9 Nm, Mark after torque
- Perform a zero adjust of the Hioki resistance meter. See Resistance Meter (Zero Adjust).
-
Perform Hioki resistance test at each HV joint from HV busbar lead to bolt head
Note2x HV joints, The acceptable resistance is between 0.050 mΩ (50 μΩ) and 0.195 mΩ (195 μΩ). If the resistance is greater than 0.195 mΩ (195 μΩ), stop work and escalate the Toolbox session. If the resistance is lower than 0.050 mΩ (50 μΩ), reposition the probes and measure again. If the resistance is repeatedly between 0.00 mΩ and 0.050 mΩ (50 μΩ), Hioki test passed, proceed to next step
-
Install fastener securing busbar cover access door
Note1x bolt, 10mm, 9 Nm
-
Position LH rear body harness under LH lower C pillar trim
-
Install LH body harness onto rear body
Note1x clip
-
Partially install LH B-pillar lower trim
Note1x push clip
- Perform a cooling system vacuum refill. See Cooling System - Vacuum Refill (Test/Adjust).
- Connect the LV power. See LV Power (Disconnect and Connect) (Modify).
- Unlock the vehicle gateway. See Gateway (Unlock).
- On the touchscreen, tap the Service Mode "wrench" (at the bottom of the touchscreen UI), and then tap , and allow the routine to complete.
-
Tap , and allow the routine to complete.
NoteMake sure vehicle is not in Drive, shifting the vehicle into Drive will stop this routine. The test will last approximately 10 mins. The test will vary speeds from 3500-6500 RPM (idle speed = ~1500 RPM) and actuate the valve between series and parallel. If speed hovers at 7000 RPM, it indicates the pump is air locked, perform the vacuum fill again. Continue to add coolant and purge until the coolant level reaches between the NOM and MAX Lines on the bottle.
-
Torque both RH forward HV battery bolts
Note2x bolts, EP20, 136 Nm
-
Install RH front cabin carpet support access plug
Note1x plug
-
Fold RH front main cabin carpet back to original position
- Install the RH side center console panel. See Side Panel - Front - Center Console - RH (Remove and Replace).
- Install the RH lower A-pillar trim. See Trim - A-Pillar - Lower - LH (Remove and Replace).
-
Install RH front primary door seal
NoteVerify seal is seated properly on all trim panels
-
Move RH front seat forward
NoteAdjust seat back if needed to avoid contacting headliner
-
Torque both LH front inner HV battery bolts
Note2x bolts, EP20, 136 Nm
-
Install LH front cabin carpet support access plugs
Note1x plug
-
Fold LH front cabin carpet back to original position
- Install the LH side center console panel. See Side Panel - Front - Center Console - LH (Remove and Replace).
-
Connect E-CALL speaker connector
Note1x connector
-
Install OBD port
Note2x tabs, Ensure black tabs in lock position
- Install the LH lower A-pillar trim. See Trim - A-Pillar - Lower - LH (Remove and Replace).
-
Move LH front seat forward
NoteAdjust seat back if needed to avoid contacting headliner
-
Torque LH rear inner HV battery bolt
Note1x bolt, 16mm, 66 Nm, Located below LH rear main carpet
-
Torque RH rear inner battery bolt
Note1x bolt, 16mm, 66 Nm, Located below RH rear main carpet
-
Remove air bag from between rear cabin carpet and body
-
Torque LH middle inner HV battery bolt
Note1x bolt, 16mm, 66 Nm
-
Fold LH side of rear main carpet to its original position
-
Torque RH middle inner HV battery bolt
Note1x bolt, 16mm, 66 Nm
-
Fold RH side of rear main carpet to its original position
-
Connect the 2nd row 40 seat connector.
- Install the 2nd row LH and center seat assembly. See Seat Assembly - 2nd Row - LH (5-Seat) (Remove and Install).
-
Inspect coolant level and top off as necessary
NoteEnsure that fluid level is at Max line, Vacuum fill required if greater than 1L lost during repair
-
Install coolant bottle cap
- Exit Service Mode. See Service Mode.
- Run ODIN routine PROC_ICE_X_EXIT-SERVICE-MODEvia Toolbox:(link)
- Install HEPA filter. See HEPA Filter Assembly (Remove and Replace).
- Install the rear underhood apron. See Underhood Apron - Rear (Remove and Replace).
-
Move RH front seat to original position
NoteAdjust seat back if needed to avoid contacting headliner
-
Move LH front seat to original position
NoteAdjust seat back if needed to avoid contacting headliner
- Close liftgate.
-
Raise all four windows and close all four doors.
NoteUnlatch doors before closing if necessary