EXV3 Core - Supermanifold (6 Seat) (Remove and Replace)
 Correction code
TBD
FRT
0.35
NOTE: Unless
otherwise explicitly stated in the procedure, the correction code and its
associated FRT reflect all of the work required to perform this procedure,
including the linked procedures. Do not stack correction
codes unless explicitly told to do so.
NOTE: See Flat Rate Times to
learn more about FRTs and how they are created.
NOTE: See Personal Protection to make
sure you are wearing proper PPE when performing the procedure below.
NOTE: See Ergonomic Precautions for safe and healthy
working practices.
Correction code
TBD
FRT
0.35
NOTE: Unless
otherwise explicitly stated in the procedure, the correction code and its
associated FRT reflect all of the work required to perform this procedure,
including the linked procedures. Do not stack correction
codes unless explicitly told to do so.
NOTE: See Flat Rate Times to
learn more about FRTs and how they are created.
NOTE: See Personal Protection to make
sure you are wearing proper PPE when performing the procedure below.
NOTE: See Ergonomic Precautions for safe and healthy
working practices.
Torque Specifications
Remove
- Set up the AC machine.
- Unlock the vehicle gateway. See Gateway (Unlock).
- Perform the following routine using Service Mode or Toolbox (see 0005 - Service Modes): PROC_VCFRONT_X_START-THERMAL-FILL-DRAIN-REFRIGERANTvia Toolbox:(link)
-
Power off the vehicle from the center
display.
NoteOn the touchscreen, touch .
- Remove the HEPA filter assembly. See HEPA Filter Assembly (Remove and Replace).
- Remove the underhood storage unit. See Underhood Storage Unit (Remove and Replace).
-
Recover the A/C refrigerant. See
A/C Refrigerant (Recovery and Recharge) (Restore).
WarningMake sure there is no overpressure in the A/C system before performing the following steps. Failure to do so may result in damage to components and/or personal injury.WarningHFO-R1234yf and R134a are considered hazardous and, if handled incorrectly, can cause serious injury. Suitable personal protective equipment, consisting of face and eye protection, safety glasses, face shield, heat-proof gloves, chemical resistant gloves, rubber boots and apron or waterproof overall must be worn when carrying out operations on the air conditioning system.
- Remove A/C machine hoses from the vehicle.
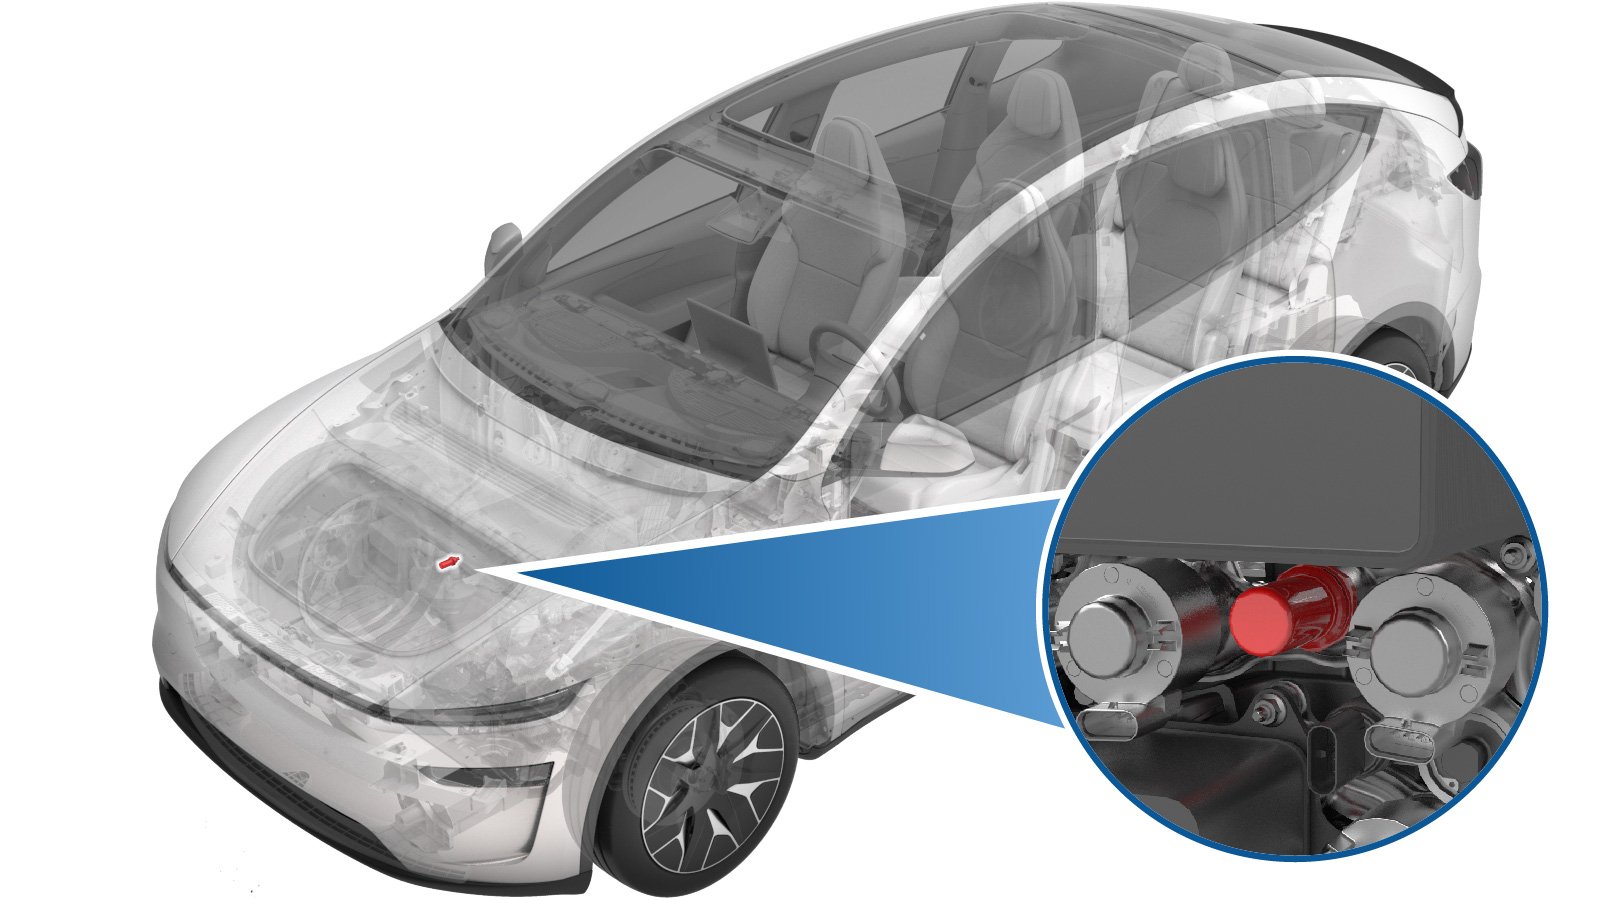
-
Carefully depress the Schrader valves (x2) to level out any pressure difference between the A/C system pressure and the actual ambient atmospheric pressure.
CAUTIONMake sure to depress both Schrader valves. Failure to do so may result in injury.
-
Remove the bolt that attaches the
supermanifold-to-compressor A/C line to the supermanifold.
NoteUse of the following tool(s) is recommended:
- 13 mm socket
-
Remove the supermanifold-to-compressor
A/C line from the supermanifold, and move it aside.
NoteCarefully position the line so that oil does not drip out.
-
Remove the bolts (x3) that attach the supermanifold harness bracket to the
supermanifold.
NoteUse of the following tool(s) is recommended:
- 8 mm deep socket
-
Disconnect the pressure and
temperature sensor connectors (x3).
CAUTIONDO NOT push down on the red locking tab. Pull the tab away from the connector until the connector is unlocked, and then continue pulling the main body of the connector to fully disconnect it.
-
Grip the bottom of the coils, and pull the supermanifold harness bracket and the
valve coils evenly outward to disengage them from the supermanifold.
-
Remove the EXV3 core from the
supermanifold.
NoteUse of the following tool(s) is recommended:
- 1588741-00-A - HVAC Socket Kit
- Flex head ratchet/flex head torque wrench
Install
-
Lubricate O-rings on the valve core
with the appropriate A/C oil. See for A/C oil specifications. Then hand-start the valve core into the
supermanifold.
NoteMake sure that the seals are properly seated.
-
Fully torque the EXV core on the
supermanifold.
 19 Nm (14.0 lbs-ft)NoteUse of the following tool(s) is recommended:
- 1588741-00-A - HVAC Socket Kit
- Flex head ratchet/flex head torque wrench
-
Remove the seals from the coils, and
then install them to the expansion valve cores.
NoteThis is to aid coil installation.
-
Install the supermanifold harness bracket and the valve coils to the
supermanifold.
-
Connect the pressure and temperature sensor connectors (x3).
CAUTIONPush the red locking tab towards the connector to engage the locking mechanism. DO NOT push down or pull up on the red locking tab.
-
Install the bolts (x3) that attach the supermanifold harness bracket to the
supermanifold.8 Nm (5.9 lbs-ft)NoteUse of the following tool(s) is recommended:
- 8 mm deep socket
-
Install new seal washers on the
supermanifold side of the supermanifold-to-compressor A/C line, and then lubricate the
washers with a small amount of the appropriate A/C oil. See Fluids and Capacities for A/C oil specifications.
-
Position the supermanifold to
compressor A/C line onto the supermanifold, and then hand-tighten the bolt that attaches
the A/C line to the supermanifold.
-
Tighten the bolt that attaches the
supermanifold to compressor A/C line to the supermanifold.22 Nm (16.2 lbs-ft)NoteUse of the following tool(s) is recommended:
- 13 mm socket
- Perform the vacuum leak test and oil injection, and A/C refrigerant recharge. See A/C Refrigerant (Recovery and Recharge) (Restore).
- Install the HEPA filter assembly. See HEPA And Carbon Filters (Remove and Replace).
- Install the underhood storage unit. See Underhood Storage Unit (Remove and Replace).
- Unlock the vehicle gateway. See Gateway (Unlock).
-
Perform the following
routine using Service Mode or Toolbox (see 0005 - Service Modes):
PROC_VCFRONT_X_STOP-THERMAL-FILL-DRAINvia Service Mode:
- Thermal ➜ Actions ➜ Stop Thermal Fill/Drain
- Thermal ➜ Coolant System ➜ Stop Coolant Fill/Drain
- Thermal ➜ Refrigerant System ➜ Stop Refrigerant Fill/Drain
- Drive Inverter ➜ Front Drive Inverter Replacement ➜ Stop Fluid Fill/Drain
- Drive Inverter ➜ Rear Drive Inverter Replacement ➜ Stop Fluid Fill/Drain
- Drive Inverter ➜ Rear Left Drive Inverter Replacement ➜ Stop Fluid Fill/Drain
- Drive Inverter ➜ Rear Right Drive Inverter Replacement ➜ Stop Fluid Fill/Drain
- Drive Unit ➜ Front Drive Unit Replacement ➜ Stop Coolant Fill/Drain
- Drive Unit ➜ Rear Drive Unit Replacement ➜ Stop Coolant Fill/Drain
- Perform the following routine using Service Mode or Toolbox (see 0005 - Service Modes): TEST-SELF_VCFRONT_X_HEAT-PUMP-COMMISSIONINGvia Service Mode:Thermal ➜ Refrigerant System ➜ Commission Heat Pumpvia Service Mode Plus:Drive Inverter ➜ Front Drive Inverter Replacement ➜ Heatpump commissioningvia Toolbox:(link)
- Exit Service Mode. See Service Mode.
- Raise the LH front window and close the LH front door.