2026-02-27
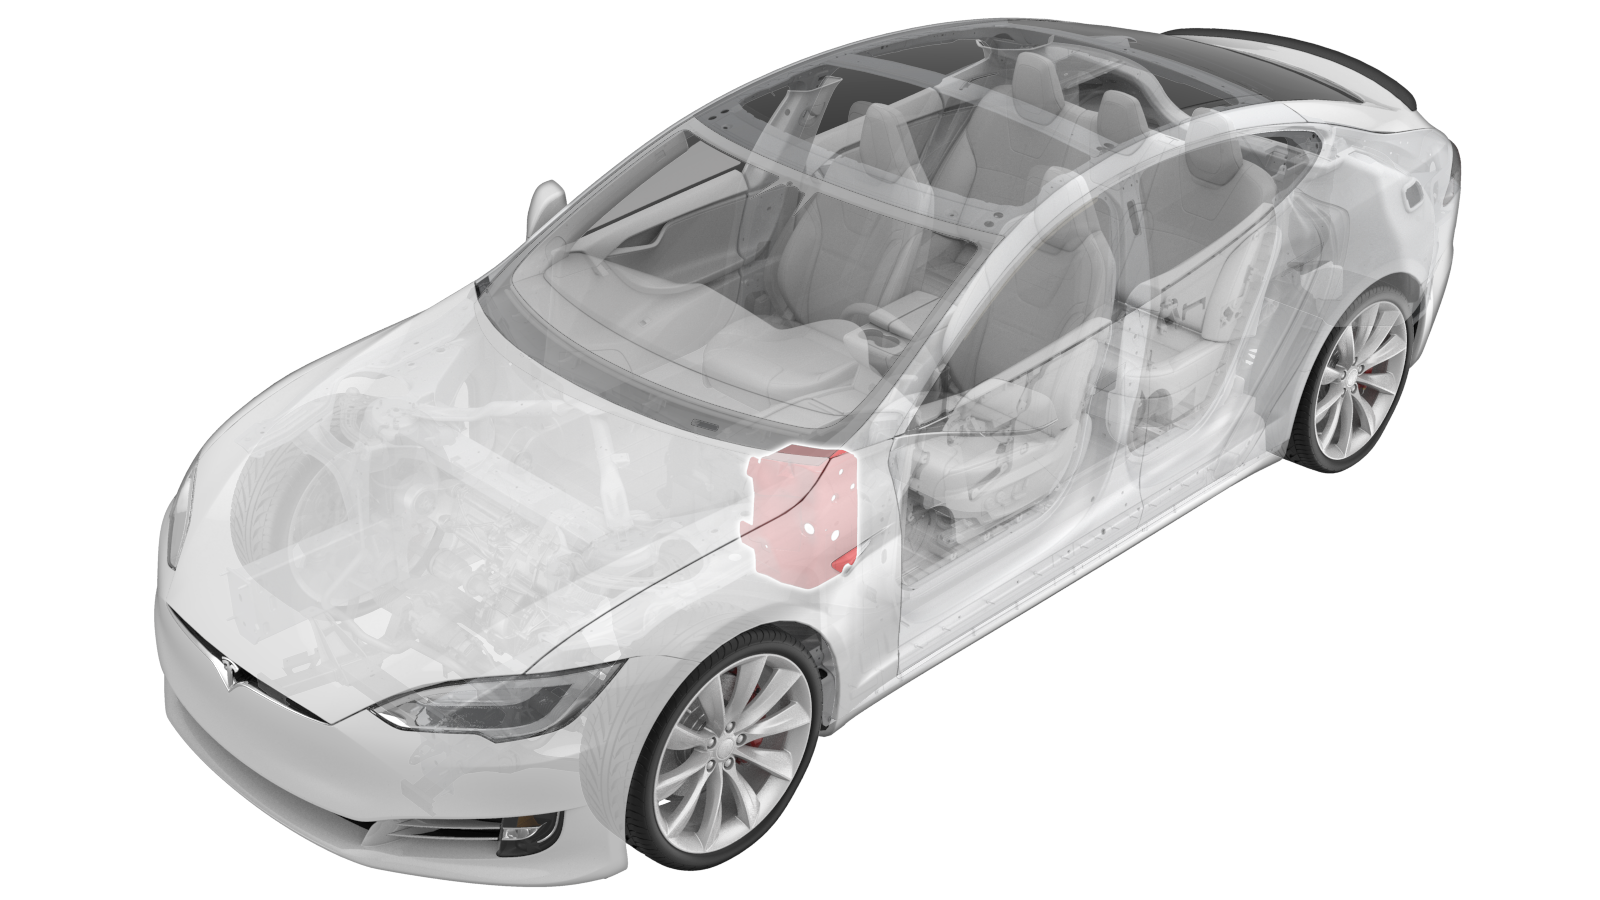
Insulator - Dash - Interior - LH (Remove & Replace)
 Correction code
15301212
Correction code
15301212
Removal
- Open all doors and lower the windows.
- Remove the LH front seat (refer to procedure).
- Remove the RH front seat (refer to procedure).
- Remove the center console assembly (refer to procedure).
- Remove the LH middle A-pillar trim (refer to procedure).
- Remove the LH lower dash trim (refer to procedure).
- Remove the LH sill panel trim (refer to procedure).
- Remove the glove box (refer to procedure).
- Remove the RH footwell cover (refer to procedure).
- Remove the RH sill panel trim (refer to procedure).
- Remove the instrument panel top pad assembly (refer to procedure).
-
Remove the Autopilot ECU:
- Remove the defrost mesh grille assembly (refer to procedure).
- Remove the RH instrument panel finisher (refer to procedure).
- Remove the instrument cluster frame (refer to procedure).
-
Remove the screws (x2) that attach the
LH inner instrument panel finisher with vent to the IP carrier (torque 2 Nm).
-
Release the clips that attach the LH
inner IP finisher with vent to the instrument panel carrier and remove the finisher with
vent from the vehicle.
Note3x clips
- Remove the LH outer instrument panel finisher (refer to procedure).
- Remove the upper steering column (refer to procedure).
- Remove the instrument cluster (refer to procedure).
- Remove the center display (refer to procedure).
-
Release the clips that attach the
tweeter harnesses to the IP carrier near the LH and RH A-pillars.
-
Remove the clips that attach the dash
harness to the instrument panel carrier.
-
Remove all fasteners (x15) that attach
the instrument panel carrier to the cross car beam (torque 2 Nm).
-
Pull the instrument panel carrier
forward for better access to speaker and edge clip removal.
- Remove the screws (torque 2 Nm) that attach the RH, center and LH dash speakers, and then remove the speakers.
- Remove the instrument panel carrier from the vehicle.
-
Disconnect the headliner harness at
the LH A-pillar and release it from the vehicle.
-
Release the cross car beam harness
connectors (x7) at the LH lower A-pillar.
NoteOnly release the connectors that run to the harness on the cross car beam.
-
Disconnect the cross car beam harness
connectors (x7) at the RH lower A-pillar.
NoteOnly release connectors that run to the harness on the cross car beam
-
Remove the bolts (x3) that attach the
cross car beam to the HVAC assembly (torque 10 Nm).
-
Remove the bolts (x7) that attach
fasteners securing cross car beam to vehicle (torque 27 Nm).
-
Remove the cross car beam from the
vehicle.
NoteRecommend assistance.
-
Remove the dead pedal finisher and
fold the LH carpet rearwards.
-
Remove and discard the nuts (x2) that
attach the driver footwell bracket to the body (torque 2 Nm), and then move the driver
footwell bracket aside.
- Move the driver footwell bracket aside to gain access to the LH dash insulator.
-
Remove the LH dash insulator from the
vehicle.
Installation
CAUTION
Replace all patchbolt(s).